
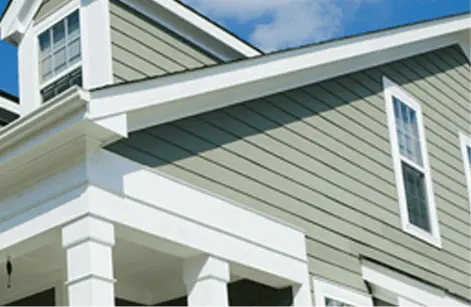
Tile Roofing Installation
Mighty Dog Roofing provides the the best choice for tile roofing installers located at Plano Texas. There is no company with the experience, professionalism, or workmanship to match ours in the field of Plano roofing. We’ve got more than 30 years of industry experience to our credit We’re excited to share what we know about your roof.
Installing a Tile Roof?
Concrete tiles are another option for roofs. There are many different varieties of concrete tiles to choose from. The disadvantage is that concrete is heavier than other tiles however the concrete can also be warmer and easier to deal with. Before you begin, you need to make sure that you have all the tools necessary to perform the project completely. You will need a saw, cant strips, insulation, tiles, metal flashing, and battens.
How to Install a tile roof
To begin, you will need to add your roofing insulation to the flat surface of the roof. There is many different types of roofing insulation to choose from so you can decide when you are ready. The most popular type is the thirty-pound felt. This is the most common choice for homeowners because it does a good job at protecting your roof and keeping damaging water away from the structure.
Next you want to install the metal flashing where you feel it is needed. Flashing helps to join to areas or sections of roofing together such as around skylights and chimney’s. The best choice in flashing is the twenty-eight gauge corrosion-resistant metal.
Now you want to nail down the cant strip flat against the eave of the roof. You will need to make sure that the strip slants the first layer of tiles so that it will create an even pattern with the rest of them. That way water can drain down like it should.
Now you will need to measure the length of the tile and then mark the next area. Be sure to allow a one-inch overhang for the eave to be covered. You will then want to nail the batten blow the tiles and flat against the line. Do this all the way through until you have completed the entire roof tile look. Follow through with locking all the joint areas to make sure that you form a good seal using your tiles and that will protect them.
Over the years you may find that a clay is not suitable for your environment due to too harsh of a winter or because you do not like the look of the finished project. Tile has been used for many years and has proven to be dependable and reliable in separating you from the harsh elements. Instead of going with the normal clay look choose another design instead.
Concrete Tile Roofing Solution For Diverse Requirements
Concrete tiles have been in use for over 10 years. These tiles are durable and virtually impervious to all kind of pest. They also require the least amount of maintenance compared to other options. Concrete tiles are extensively used for roofing due to their numerous benefits. To ensure that the tiles are efficient there are certain requirements to follow.
Roof washing
Properly cleaning the roof is crucial. It should not accumulate dry leaves or other materials that hold moisture, which can cause fungus to develop and decrease its longevity. It is important that concrete tiles are cleaned after they are put up. However, it can be difficult to wash the roof. Therefore, it is recommended to employ a business that can provide complete roofing solutions. To ensure its longevity you must apply an adsorbent with fungicide once the roof has been washed.
Repair
The weather changes can cause tiles to become weathered after they’ve been put in. This is why it is essential that the damaged tiles be replaced. The roof solution that installs the roof provides the maintenance service. This is why you should contact them for the repair work too. Damaged tiles could allow snow and rain to pass through the lower portion of your home. In order to safeguard your home from any damage caused by a roofing issue it is important to be aware of the need to repair tiles as soon as you notice it.
Re-pointing
The concrete tiles once in a while require being pointed again. Re-pointing services are offered by roofing companies that install roofs. After a period of time it is advised to have the tiles repaired. If you do not take care the possibility is that there could be an issue with seepage. Tiles that aren’t placed or pointed may create distortions in the appearance of your roof.
Concrete tiles can be heavy therefore ensure that your roof is well-supported when installing concrete tiles. In addition to their weight, if considered an issue, they provide one of the best roofing options that can be used to satisfy a variety of needs. You should hire a company that has experience in providing a complete roofing solution and a proven track record in the installation of concrete tiles.
Exceptional Features of Tile Roofing
The tile roofing option is the best option for architects and homeowners because of its high-quality timeless looks and integral energy efficiency features. It’s supposed to be among the most stunning, long-lasting and cost-effective in the world. Roofers are experts in the installation and maintenance of clay roofing tiles, as well as concrete roofing tiles. They can also flawlessly install and maintain the following high-quality tile roofing products which include:
1. Clay Roof Tiles
2. Metal Roof Tiles
3. Asphalt Roofing
4. Spanish Style
5. Composite roofing tiles
Reputable roofing contractors provide residential and commercial roofing solutions for different purposes. They offer attention to detail for every roof construction project, repair work inspections and renovation. Since tile roofing is comprised from concrete and clay numerous people select it for their home remodeling projects. Its weight alone gives exceptional strength to the roof in general.
It might be the most suitable alternative for you if not familiar with roofing. It is timeless and beautiful to your home and isn’t prone to extreme climatic conditions. It’s also selected because of its several enticing attributes, such as:
Curb Appeal
Tile roofs give a stylish look, elegance and charismatic aesthetics to homes and offices. Its unique and premium architectural style is one of the reasons it is preferred. It can also be used to match the theme of the house and is often available in a variety of colors and styles. The obvious benefit is that it is easy to customized to suit your personal style needs and home’s appearance. If you’re an architect or homeowner, you will find the amazing features of the roofing tiles. It is also a great way to improve the beauty of your home in terms of value, quality, and overall appearance.
Shapes and colors
It comes in a wide variety of colors, styles forms, and formats to meet the ever-changing needs of homeowners. There are many types of roofing tiles made from concrete. Tile roofing can come in the form of shake, shingle as well as traditional Spanish or Mediterranean styles. The tiles can be constructed artistically by hand according to the demands. For a richer palette of colors and textures, people favor hand-brushed tiles.
Durability
Tile roofs are able to withstand the most severe natural conditions. It can withstand through the elements of snow, rain, wind, and hail. Due to its versatility and durability, tile roofs must be properly installed. It’s maintenance free and will provide years of performance throughout the decades.
Affordability
It may be slightly higher than shingle roofs but a tiled concrete roof lasts longer and will provide the similar strength throughout the year. It is highly efficient in nature and is the most efficient energy-saving choice for construction, architect and home renovators.
It is important to choose the most skilled company to offer you unique and striking tile roofing.
How to Repair a Tile Roof
If you’ve got a tile roof over your house and it is leaking, you shouldn’t be quick to make assumptions and believe that the cause is damaged tiles. The reason for this is that the leak could be coming from a poorly constructed roof jack around pipes or an air conditioning unit.
It is first necessary to get into your attic in order to discover the cause of the leak. Water can travel several feet over felt paper before it reaches the attic.
If you can spot the damaged tile, this does make your job a lot easier and the most important thing you’ll want to do is replace the broken tile, without breaking it further while you’re on the roof. If you are over 200 pounds, think about asking a friend to assist you on the roof with a flat tile.
Another method of distributing your weight is to use a few 2X8s under the roof. Another trick is to place pieces of flat sheet metal beneath the tile damaged and then use roofing plastic to glue everything back in place, which usually can work.
If you are determined to replace the tile completely though, then employ a flat-bar to place it under the broken tile, and then cut or pull any nails and remove it. After that, then slide a new tile over it and then use roofing plastic to secure it. Do not begin hammering nails into a preexisting tile roof or you will be exactly where you were at in no time with more damaged tiles.
How to Upgrade Your Roof With Tile Roofing
A home improvement project usually involves installing the roof with a new one or replacing one that is old. While it’s an essential aspect of home improvements, it’s certainly one of the most expensive and laborious of jobs.
The type of roof you install depends largely upon the climate conditions of the location you live in. Be aware that a roof is not something that you change everyday. A roof that is properly planned will last at the very least 10 years.
One of the most fashionable types of roofing is Clay tile roof. This type of roof is associated with Spanish architecture. The style of roof should be matched to the architecture of your home as well as the weather. A roof made of clay has numerous advantages. Clay tile roofing is a good choice due to its longevity and doesn’t require being maintained.
This type of roof can last as long as 50 years if it is well-maintained. But there is a important drawback to this type of roofs. They require specific material and skills, and therefore cannot be done by everyone and anyone. The expense of constructing a roof significantly higher than other kinds. The roofing material is suitable for climates that are hot. This is why it is very popular across California, Florida, and Nevada because it is able to endure the scorching heat and heat of the sun.
Clay tile roofing should be set up in a manner that is suitable for the weather. Second, it is crucial to seek out expert assistance. When installed correctly, the roofing of your home will be able to last for a long time.
Tile Roofing Installation FAQs
Tile roofs last a long time, with many homeowners reporting that their tile roof outlasts the home itself. Generally, tile roofs last anywhere from 50-100 years with proper maintenance, making them one of the most durable roofing materials.
The cost of a tile roof varies depending on the type of tiles used and the slope and size of the roof. In general, you can expect to pay anywhere from $7 to $12 per square foot for a new tile roof. While tile is one of the more expensive roofing materials, it can offer unmatched long-term benefits when it comes to durability and energy efficiency.
The most attractive feature of tile roofing systems is their durability and longevity. A tile roof can last for decades (even centuries, in some cases!) when installed properly. Tile roofs are also highly resistant to severe weather conditions, such as high winds, hail, and wildfires, making this material a relatively low-maintenance option.
Tile roofs also offer energy efficiency. A well-insulated tile roof can help keep your home cooler in the summer and warmer in the winter, resulting in lower energy bills year-round.
The most popular types of tile roofing in Colorado are concrete and clay. Concrete tiles are made from sand, water, cement, and pigments, while clay tiles are made from naturally-occurring materials like shale or fireclay.
Both materials have pros and cons, but concrete tiles are generally more affordable, while clay tiles are more durable. If you’re not sure which type of tile roofing is right for your home, it’s a good idea to speak with a local roofing contractor who can help you choose the best option for your specific needs.
Both clay and concrete roofing tiles are non-combustible and have a Class A fire rating, the highest possible rank. While tiles do not make a home fireproof, they allow for more circulation, making them your best bet if a fire were to occur in or around your home.
When it comes to fade resistance, tile roofs can offer excellent protection against the sun’s ultraviolet (UV) rays. Many types of roofing tile have a UV-resistant coating that helps to keep the tiles from fading over time. If you’re looking for a roofing option that will maintain its beauty indefinitely, tile is definitely worth considering.
Slate Roofing Installation
Mighty Dog Roofing provides the the best choice for roofer slate roofing installers located at Plano Texas. Our Plano slate roofers are among the top in the area. This makes them among the most reputable roof contractors in Plano. We’ve completed slate roofs for nearly sixty years. We’d instead not take shortcuts or cut corners since we understand how crucial these factors are. You may rely upon us to provide an excellent product and excellent service.
Slate Roof Installation With Hip and Ridge Joints
Slate roofs are preferred by many as they are among the best types of roofs. Though the installation cost quite a bit of money, slate roofs are great in improving the general appeal of the housing. Usually, homes with this type of roof installation have higher values.
Slate roof installation involves setting the hip and ridge joints. Before slating the roof, furring strips along the hip need to be installed. The standard thickness of slates is 3/16″ to 1/4 “. For slates with this thickness, 3/4″ furring strips are recommended. Nail these furring strips to the roof using 2.5″ hot dipped galvanized common nails.
On the bottom of the furring strips, install the first piece of the copper flashing using 1.5 copper roofing nail. To hide the furring strips, fold the bottom of the flashing.
Slate roof installation follows after the copper flashing has been nailed and folded. Install the slates over the flashing by nailing them into the furring strips. 1.5 copper roofing nails can be used but certain areas need to be attached with 2.5 copper roofing nails.
Install the next piece of step flashing over the hip slates. For this, a single nail will do. After this, nail the next pair of hip slates over it with at least two nails per slate. Fold the flashing lengthwise in half with 4″ in each side. With this, the overlying slates and flashings, the 16″ hip slates are to be overlapped halfway. Meanwhile, the step flashings would be overlapping each other by 2″.
Continue the setting up in this manner, flashing over the top of each pair of hip slates. The hip slates can be installed even without cutting and they do not to be tapered as well. To finish quickly, install the slates in pairs, not one side at a time.
Slate Roofing Made Easy – Choosing The Right Tools And Materials
If you want to install your own slate roofing, it is strongly recommended that you do your research ahead of time. You must be prepared to succeed. Make sure you know about the types of slate, manufacturing methods Flashing, sheathing nailing and other materials before you begin.
The first step is to ensure that your roof is suitable for the installation of slate roofing. Slate roofs shouldn’t be installed with a slope of 4:12 (4 feet of rise on 12 feet of run). If your roof is in compliance with the requirements above, you must look into purchasing the proper tools for cutting as well as the materials required to complete the task.
Tools
Get the correct slate tools and apply them. The toolkit that you need to start with will include an a slate ripper slate cutter and a hammer. Make use of a slate cutter not a diamond-cutting saw, when cutting slates. The former creates a bevelled edge on the slate which matches the design of all other slates, whereas a diamond blade will produce the appearance of a square edge. unnatural.
Slates
There are a variety of slates to choose from, and not all slates are the same. You need to choose the best slates for your roof. When selecting slates, take into consideration the quality, type size, thickness and the implications for your project. A slate with a higher thickness can be more difficult to cut while smaller slates can take longer to install due to the fact that there are fewer of them.
Make sure that the slates have the nails in the proper location. The holes should be positioned so that you can get the nails to be just above the top of the underlying slate. If the holes for nailing are too shallow, you’ll be nailing right through the top of the slate underneath, and you shouldn’t do this as it could cause leaks.
Make sure that you purchase the appropriate amount of slates. It is crucial to determine your head lap ahead of time and to order enough slates to cover it. Starter course slates must be ordered separately. You want the nail holes for your starter course only across the top and on the back of the slate.
Materials
Slate Nails
The quality of nails is vital. Slate nails must be stainless steel or aluminium. In coastal areas copper nails are preferable and in severe conditions silicon-bronze nails are best.
Choose the appropriate length for your nails. When you set your nails, they must only be able to penetrate the decking boards of the roof. This is important since if they are too long, they will pass through the boards, breaking and splintering the wood at the back. This reduces the board’s thickness and increase the strength of the nails.
Decking material
The decking materials under the slate should last at least as long as slates, therefore you need to choose materials that are durable enough. This requirement is met by battens and wood boards that have a thickness of 20-40mm. They can be either rough-sawn or planned or even feature the tongue-in-groove style. Other materials for decking that are durable are concrete, which can be attached to a nail or Gypsum. Do not use laminated or plywood.
Underlay
Roofs made of slate don’t require underlay. It’s a barrier to water from the time slate tiles are laid down and the flashings are sprayed. It also serves as a base for your chalk lines. Most of the time it is enough to cover a single piece of 30lb felt suffices.
Flashing material
A good flashing material is vital. You can use stainless steel, copper, or even sheet lead. The material you choose to use is more suited to the gutters and valleys, and lighter on ridges or chimney flashings.
Slate Roofing For Your House
Before you begin to build a slate roof on your own, there are some things that you should know. Here we will discuss the different issues that come with slate roofing. The first thing you need to check is whether your roof is sloped to a ratio greater than 4:12. That is, the slope should be able to rise by 4 feet over 12 feet.
Roofing Tools
A slate hammer, cutter and a slate ripper are the most popular tools used to install slate roofing. If you don’t want get slates that are square, don’t use diamond saws and adhere to the slate cutter, which provides a beautiful finish.
Slate Variety
Slates can be found in various forms similar to other material used in construction. Slates are available in a variety of material and quality and also in varying size and thickness. The slate you select will affect how you get your roof up. You need to ensure that the slates are wide enough to allow the nail to travel through the head of the slate. This will guarantee that there aren’t any leaks.
Once you’ve selected the type of slate you want for your roof, you must purchase the right amount of slates. If you fall short when you go back to the store, you may find that the slates are gone, and you’ll end up with the roof that looks like a patch work. Buy extra slates for certain plates may be damaged during the roof building process. It is not a bad idea to buy the initial slates in a separate package.
Other Materials
The slate roofing process requires lots of nails. So, use nails which are made of aluminum or stainless steel as they do not rust as compared to iron nails. The most effective type of nail is copper if you live in severe climate zones. In slate roofing the length of nails is essential. The nails shouldn’t go beyond the roof deck. Any further will result in damage to the wooden boards.
You will also use decking materials. They must be the same size as the slates they are below. Avoid plywood and wooden decks comprised of laminated timber. Also, you can add an underlay to keep water from drying out until slates are laid.

